I had a HORRIBLE time rebuilding the OEM 5 speed shifter. The pin simply would NOT press out. We finally won using a 30 ton hydraulic press and heat, but there was much carnage. Anyway, while I was trying to repair the carnage on the OEM shifter, I thought, Hmmmm. That setup really looks like a T5 setup in a Mustang.
Sooooo, since I had a cheap eBay shifter for a mustang laying around I decided to play. Below are photos of what I ended up with. It was surprisingly easy. Some drilling/facing and some turning on a lathe (which could probably be done by hand). Add some sanding for clearance, fabricating a gasket, and a few parts.
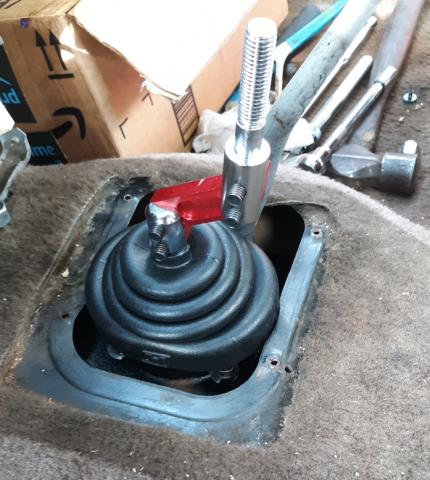
The only thing is you have to reassemble the shifter in the car since the holes to bolt to the transmission are under the top part of the shifter. Hardest part is not dropping the tension springs and bushings. Other than that it was real simple. I used the shifter base as a pattern for the bolt holes.
Sadly, the OEM shift boot wont fit over the large T5 shifter, so Ill have to fabricate something for the shift boot (probably sew up a leather shift boot for both shift levers). And I need to fabricate a shift lever still. The setup in the photos is simply for testing.
Theres a lot more that could be done like removing the excess from the shifter base, but everything fits as is without any modification to the truck.
I havent driven it yet (still no brakes), but it feels like it is going in each gear just fine.
Anyway, just my solution.
Cost:
T5 Shifter bushing installed:
OEM Shifter bottom installed:
Bolt hole pattern transfer from OEM shifter bottom:
Bolt holes faced and sanding for clearance to the 4wd shifter:


 Reply With Quote
Bookmarks