-
87 Ram 50 SBC/T5 swap
I've been lurking here off and on for a few years looking at other peoples V8 swaps and now that mine is well underway I figured Id post about my experiences putting a 283 Chevy small block and T5 into my 87 Ram 50. Hopefully it will give someone contemplating a Chevy swap into their Ram 50/Mighty Max an idea of what theyre in for.
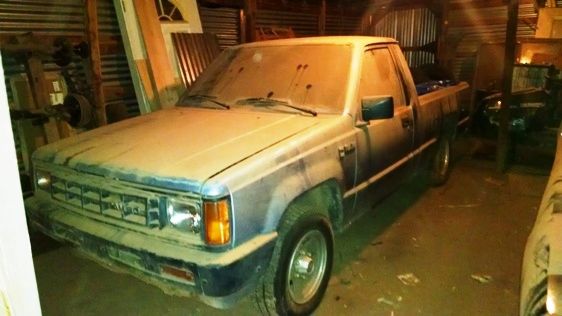
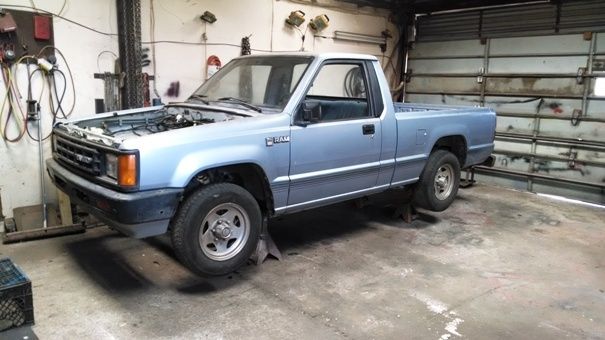
The truck: The truck is an 87 Ram 50, 2WD, 5 speed, open rear end (3.90 gears) manual steering and factory AC. The truck has a lot of family history and I ended up with it about 10 years ago when the rods started knocking. Its got a straight rust free body and because of the family connection I stuffed it in a back shed figuring one day Id get around to getting back on the road and eventually passing it on to another family member when Im through playing with it. Im an old hot-rodder so the engine swap plan always involved an American V8. Here is the truck resting just before it got moved to the main shop.
Planning: I live in Arizona (south of Tucson) at 4500 ft elevation. We get well over 100 degrees some days in the summer and Ive seen it at 0 degrees in the winter. The plan was/is to build the truck as a 365 day a year driver capable of also making an annual vacation trip to Illinois (4000 mile round trip to a 200 ft elevation).
Believe it or not the biggest consideration on this swap was being able to retain the factory AC. This is going to be a driver not a weekend toy and summer here makes the AC is mandatory.
With the hood open and looking at the little 2 liter in there, it looks like there is a lot of room for almost anything.
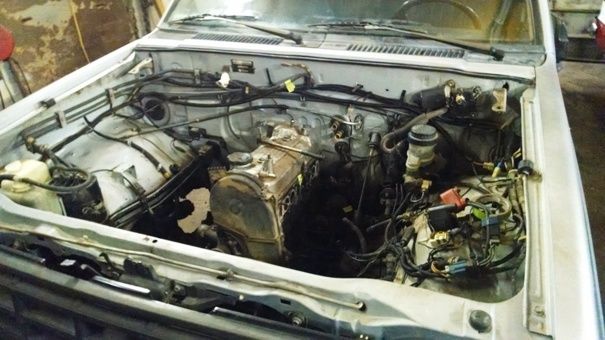
It looks that way clear up until you take a tape measure out and find out the engine compartment is really short and there is not a lot of room to go forward with the AC condenser before it hits the grill. Looking at a some of the other peoples swaps with Mopar, Ford and Chevrolet small blocks, none tht I came across had AC and in most cases they had moved the radiator either under/in the core support or in front of it. Ive built/owned Mopar, Ford and Chevrolet small blocks over the years and properly built I like them all, so brand was not a big consideration for me (although I would have kind of liked to have a Mopar engine in something that has the name Dodge in huge letters on the tailgate.
The Mopar and Ford small blocks actually seemed to fit a bit better (in large part due to the pan configurations) than the Chevy. In the end for me, the determining factor turned out to be the engine length and the Chevy SB with a short water pump is the shortest (although the Ford SB is a close second and has the distributor in the front which is an added benefit). In the end the SBC won out. On paper it looked like I might be able to run the radiator and AC condenser in the stock location
.but more on that later.
The next consideration was what to use for a transmission. From what I researched there were only 2 rear end ratios for the 2wd 87 Ram 50; 3.55 and 3.90. My truck has the 3.90 and even if it had the 3.55 an overdrive transmission is mandatory as it be will racking up a bunch of interstate miles. The 2 most logical choices from an availability/cost standpoint for me were the Borg Warner T5 5 speed manual and the TH 200 4R automatic.
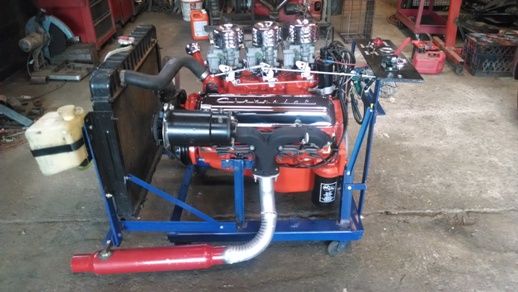
Engine: In the past I have been accused of going a bit to the extreme as far as my engine selections (my current shop truck is an 83 El Camino with a 507 Cubic Inch (8.3 L) Cadillac engine). For this project I decided that Id go in the other direction and look at a smaller displacement engine. My first thought was a 305 roller motor with Vortec heads I have in the back. Its carbureted and other than needing freshened up it is a good solid motor. In the end however I elected to use a 283 I had recently rebuilt for an era correct 1960s hot rod project that never materialized. The engine is fresh and only has a couple hours of test stand time on it. The engine specs out as follows:
1960 283 (+.060 overbore)
Steel crank
8.75:1 compression
1965 Power Pack heads (opened up for 1.94 intake valves)
Flat tappet hydraulic cam (equivalent to 275 HP fuelie cam)
Reproduction Corvette rams horn exhaust manifolds (2.5 outlets)
Id originally built the engine with Tri Power but changed it over to a single 4 BBL when the decision was made to install it in the ram 50.
Transmission: I decided Id keep the truck a manual shift and did some horse trading for a rebuilt T5 (5 speed) from a 1992 S-10. I had looked at both the S-10 and Camaro versions of the T5s and decided on the S10 version because of shifter location. It forward of where the original shifter went, but the Camaro version was too far back and would interfere with the seat adjustment.
I gave some thought to the clutch linkage when I was deciding on the bellhousing. The D50 uses a cable operated clutch and I figured it might be easiest to retain the cable type rather than building mechanical linkage or using a hydraulic setup
.Id probably rethink that now, but more on that later. As it was I managed to find a bellhousing and clutch fork from a mid 1970s V8 Chevrolet Monza (as far as I know the only SBC cable clutch setup Chevrolet ever used)
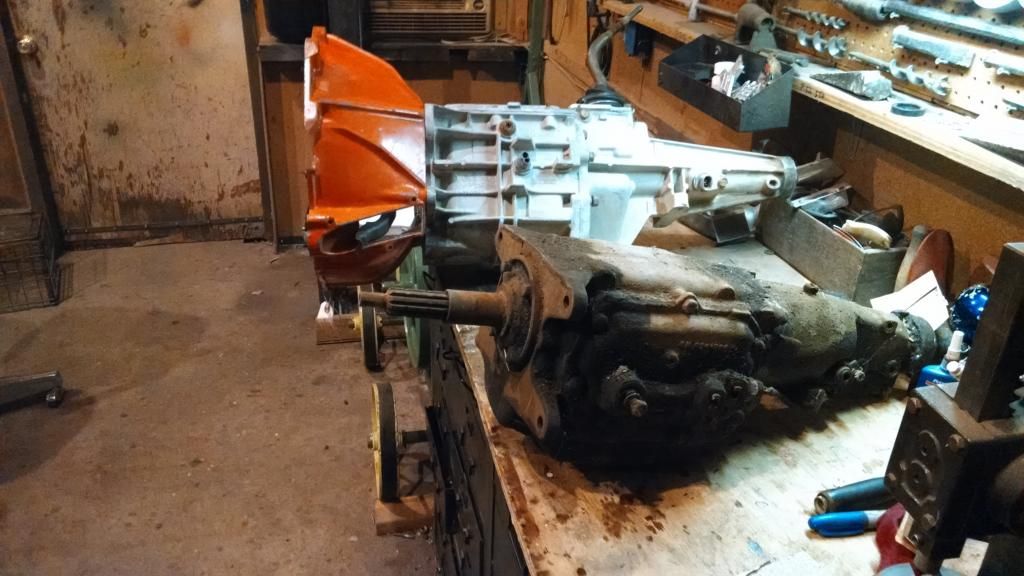
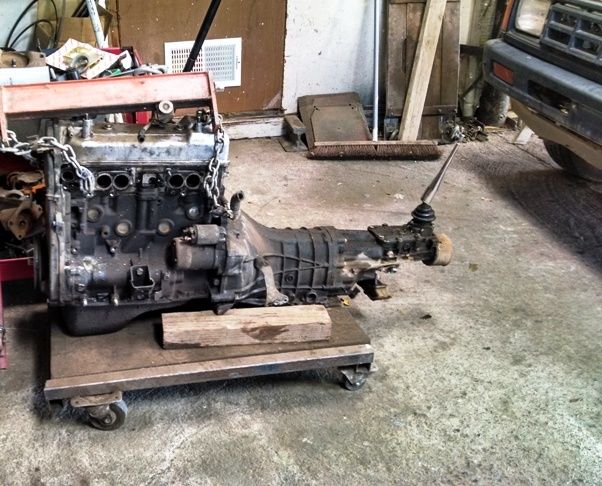
This is the transmission and bellhousing. Its next to the Saginaw 4 speed I was using for comparison prior to making the minor modifications needed to the T5 input shaft and bearing retainer.
-
Oh man this looks like it's going to be a sweet build! Keep us updated, can't wait to see more.
-
Transmission: I decided Id keep the truck a manual shift and did some horse trading for a rebuilt T5 (5 speed) from a 1992 S-10. I had looked at both the S-10 and Camaro versions of the T5s and decided on the S10 version because of shifter location. It forward of where the original shifter went, but the Camaro version was too far back and would interfere with the seat adjustment. The internal shift mechanism for the T5 is located in the top cover of the transmission which causes the transmission to be rather tall compared to a standard 4 speed (T-10, Muncie or Saginaw) or an automatic.
I gave some thought to the clutch linkage when I was deciding on the bellhousing. The D50 uses a cable operated clutch and I figured it might be easiest to retain the cable type rather than building mechanical linkage or using a hydraulic setup
.Id probably rethink that now, but more on that later. As it was I managed to find a bellhousing and clutch fork from a mid 1970s V8 Chevrolet Monza (as far as I know the only SBC cable clutch setup Chevrolet ever used)
This is the transmission and bellhousing. Its next to the Saginaw 4 speed I was using for comparison prior to making the minor modifications needed to the T5 input shaft and bearing retainer.
-
So the swap started (the old truck needs paint, but is still pretty presentable).
-
So out came the 2L and 5 speed. The engine went to a friends machine shop as a core to possibly rebuild as some point and the transmission ended up at another friends transmission shop where parts were used to get another Ram 50 back on the road.
-
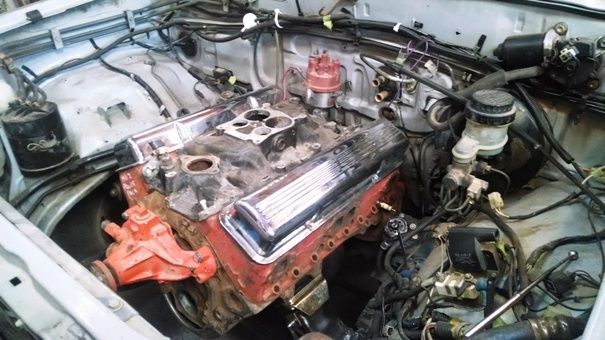
I used an old block and pair of heads I had laying around for the mockup bolted to the T5. The thought was I might be able to get the engine fairly low by using a 1963-5 Chevy II front sump oil pan and pickup. It turns out the pan sump isnt the real issue with using a SBC, its the rear sparkplug on the drivers side. With the engine as far back as it will go, it can only go down so far before the plug interferes with the steering box, even with a short header sparkplug. So it is what it is, at least I can use the common rear sump oil pan and pickup.
-
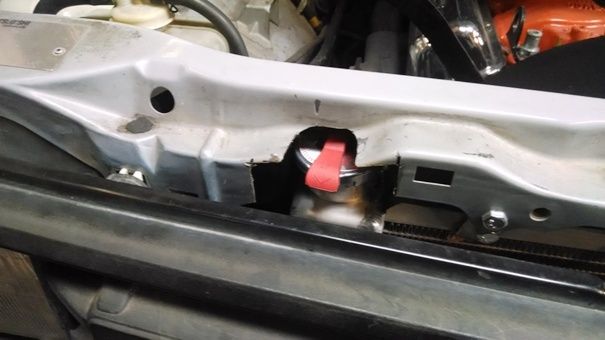
With the engine as low as it will go the next issue becomes the transmission tunnel and here is where the major surgery begins.
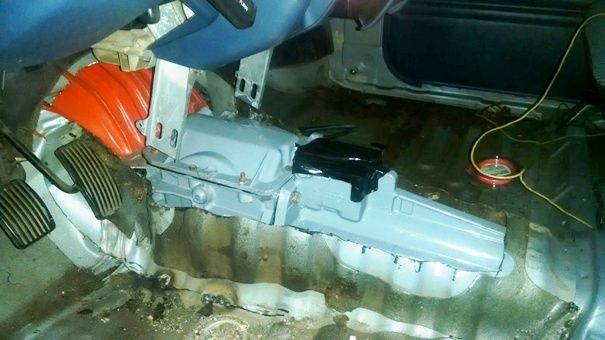
The tunnel needed to be wider and taller, so after the cuts were made there was a fair amount of hammering and trimming to get everything to fit. Even after the transmission was where it needed to be, addition tweaking was required to make sure I could get to the transmission and bellhousing bolts so clutch changes could be made without pulling the engine.
-
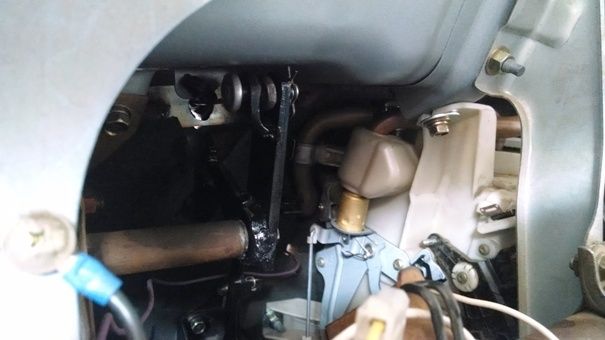
Although Id hoped to avoid it, I pulled the dash and heater box so I could get into the firewall and floor to weld the tunnel back together. As long as I was there, I also installed a new heater core and water control valve
I figured it was a good time to do it as I really dont want to have to pull the dash out a second time for a leaking heater core down the road.
Then it was piece the tunnel back together. As I don't have an English wheel, was too lazy to cut a tunnel out of a donor car, and to cheap to spring for a prefab universal tunnel, I built it in sections from some stainless I had laying around. I also built a new shift handle for the T5. I retained the stock shifter hole so I can use the the D50 boot and plate. It will take a custom carpet to fit the enlarged tunnel, but that's something for down the road.
-
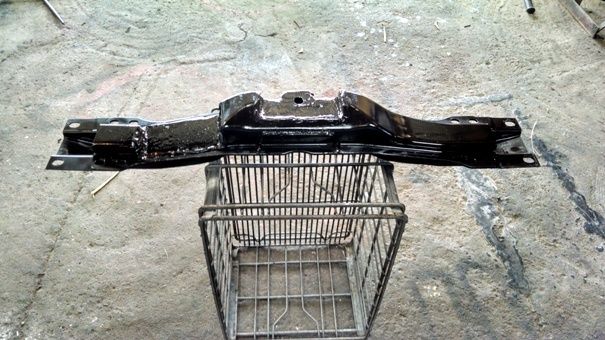
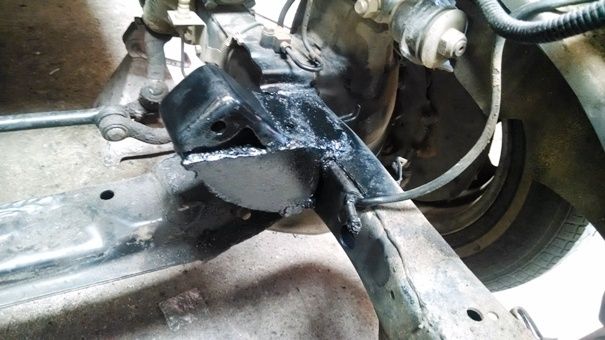
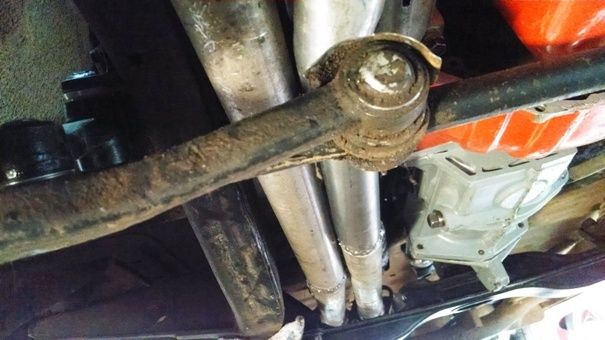
With the engine where I wanted it I started on the mounts. I did the transmission mount first. This pretty much just amounted to modifying the rear crossmember.
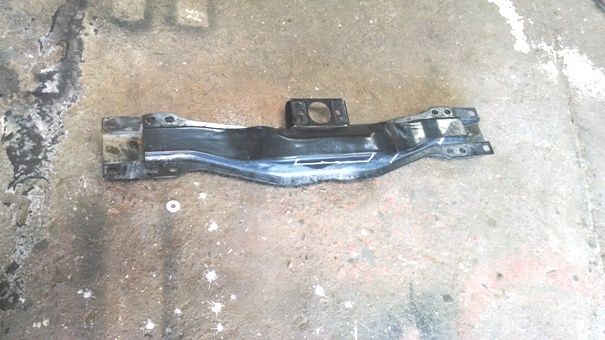
The T5 mount is back quite a bit further than the original mount , so I cut off the original mounting pad and lowered the new mounting surface, then drilled a hole for the transmission mount bolt. Im using an aftermarket single stud urethane mount. While I was at it I also flattened and enlarged the area where the original exhaust pipes goes over the crossmember
.more on that later.
-
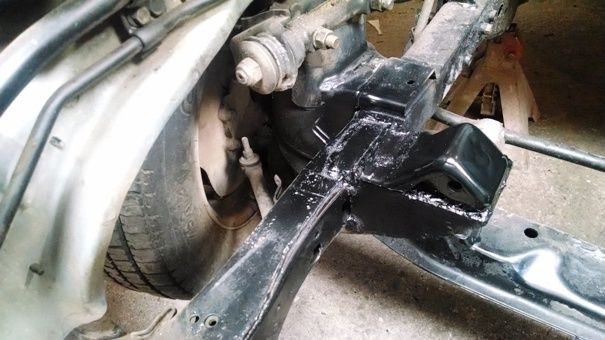
I then moved on to the front mounts. I cut off the original mounting pads and built new ones forward of the original mount location (I used stock 1960s-70s frame mounts for the start point and then built them down and over to the frame). Im also using aftermarket urethane mounts for the engine. Yeah, theyre not the prettiest Ive ever built but their solid and functional and thruck will never see a car show.
-
-
-
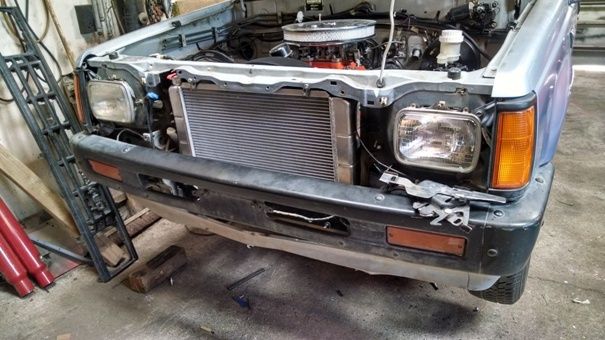
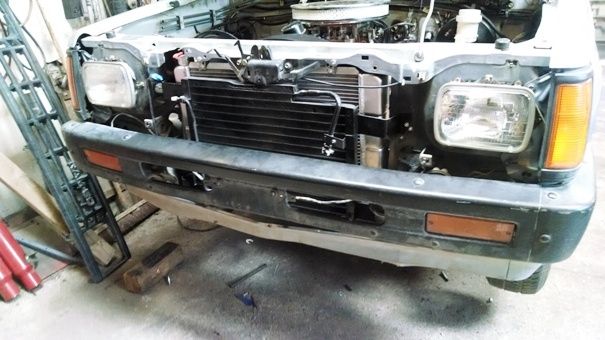
With that done I was able to get the radiator mounted. Then I set about modifying and building brackets to move the condenser moved out. With the grill on, there is just enough room to get the hoses and receiver dryer in, so that part was taken care of.
-
-
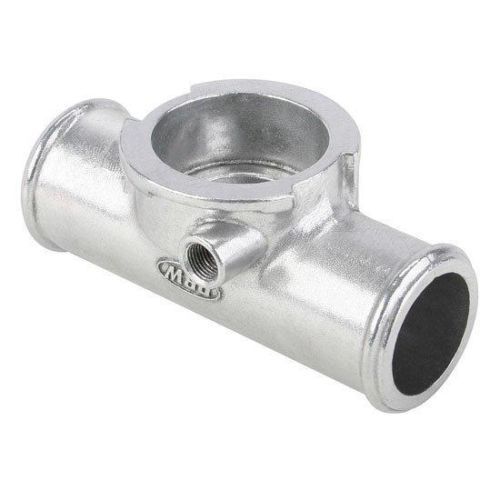
That just left a couple of minor issues to address. The first is that the radiator is actually just a bit lower than the thermostat housing. To solve the filling problem that creates Ill be using an in hose fill neck in the upper radiator hose. The other problem is that its almost impossible to remove the radiator cap on the radiator without loosening the radiator supports, and I really dont want to cut a section completely out of the upper support. I decided to put a 16 pound lever cap on the radiator and Ill use the nipple on that radiator neck for the overflow bottle. The lever will let me relieve pressure on the cooling system if I need to. Ill use a 20 pound cap on the in-line filler and plug the overflow port which will basically just limit that cap to being a fill for the cooling system.
-
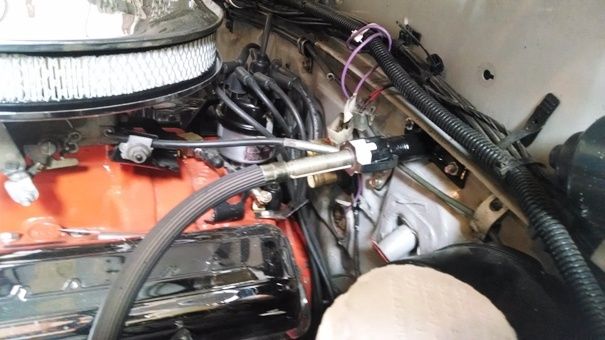
The next job I started on was the exhaust system. As I mentioned Im using repop Corvette exhaust amnifolds. I used to put headers on everything, but over the years Ive pretty much gone to factory performance manifolds wherever possible
they dont have the gasket problems and for all intents and purposes usually flow as well as a lot of headers at normal driving RPMs.
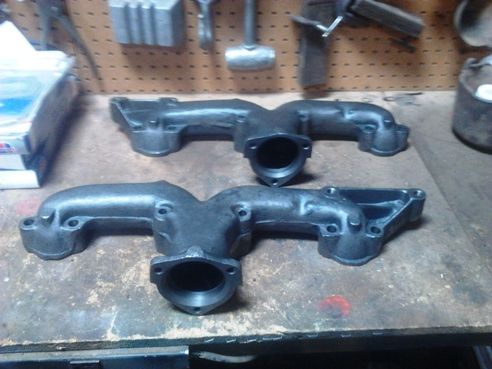
An added plus on the Corvette manifolds is both sides have bracket bosses cast in, which makes building brackets for the alternator and AC compressor a snap
.especially nice as the early Power Pack heads dont have accessory bolt holes in the ends!!!!

-
Routing dual exhaust on this truck is not as straight forward as you would suspect. The problem is the drivers side. There are 2 issues; the first is by running the 5 speed manual and cable clutch, there is no room to run the pipe by the bellhousing without melting the clutch cable (a problem I would not have to deal with if I had run an automatic transmission), the second problem is the location of the stock fuel tank which takes up all the room between the frame rail and drive shaft on the drivers side.
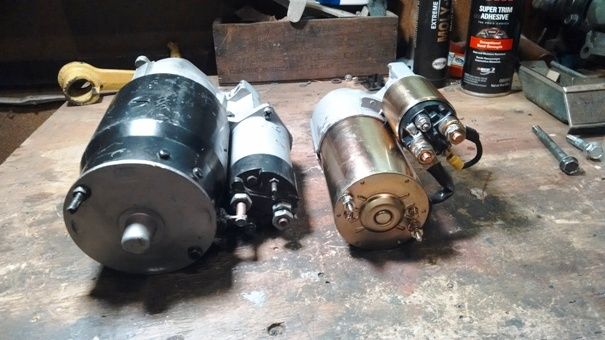
I solved this problem by crossing the drivers side exhaust under the oil pan and running both pipes down the passenger side. Space was tight so I down-sized the pipes from 2 ½ to 2 ¼ (not ideal, but still big enough to support up to a relatively stock 350 if I ever decide to up-size the engine). It got a little tight around the starter, so I changed the starter over from the standard early style to a much smaller one sourced for a 96 5.7 Camaro. Running booth pipes down the passenger side was the reason I enlarged the opening in the transmission crossmember. I still have to hang the mufflers and then Ill cross one of the pipes back over to the drivers side and run both out to the rear bumper.
-
Hooking up the clutch was next. I had a couple of new 1977 Mustang II V8 4 Speed clutch cables sitting on the shelf. The bellhousing end happens to also fit the Chevrolet bellhousing and clutch fork and they are long enough to go from the pedal to the clutch, so I figured why not use one of those. I did have to fabricate a firewall mount/adjuster for it but that was not a big problem (I also made a backing plate for it that fits on the drivers compartment side of the firewall to help prevent flexing the firewall).
That just left making a new arm to go on the clutch pedal cross shaft. The bracket was pretty simple. Im reasonably happy with the end result. The pedal pressure is good, it releases nicely and there is good free play at the top (after I adjusted the pedal stop a little). It feels like a cable clutch, but theres not much I can do about that. That being said, looking back if I were to redo it, next time I think I might go with a different bellhousing and a hydraulic setup.
-
Screwed up on the second picture.......here's the arm I made for the clutch cross shaft.
-
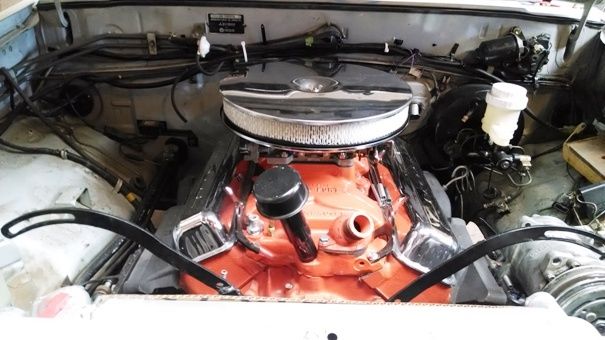
The Offenhauser dual port intake Im using is really tall combined with how high the engine sits and I ended up having to use a drop base air cleaner and 2 filter to get the hood to close.
-
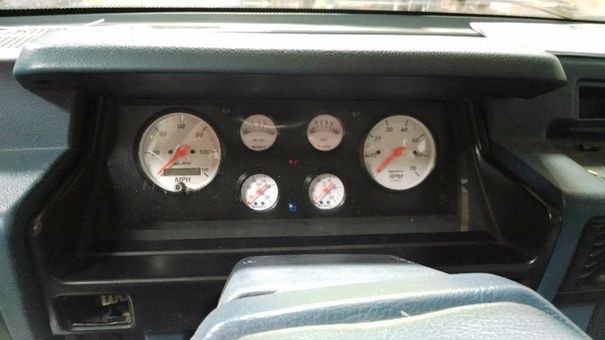
Then there was the issue with the speedometer. The T5 transmission I came up with is set up for an electronic speedometer. The original plan was to dig up the pieces to convert it to cable and retain the original gauge cluster.
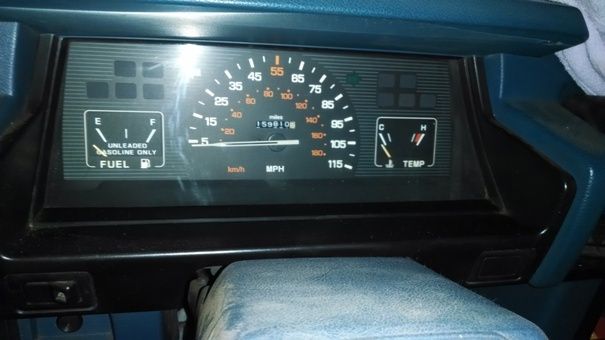
After a couple of months looking for parts we came up empty, so it was bite the bullet again and sprung for an electronic speedometer
.of course it never just ends there, I picked up a tach and of course I had to have the matching fuel, volt, temp and oil pressure gauges. Ive got to admit, I do like it, and a big plus for this old man if being able to calibrate the speedometer by pushing a button on the dash rather than changing gears at the transmission.
-
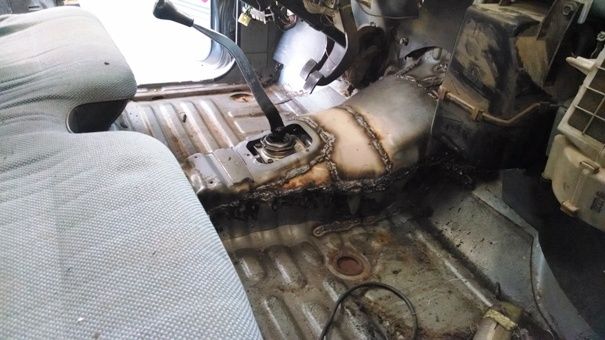
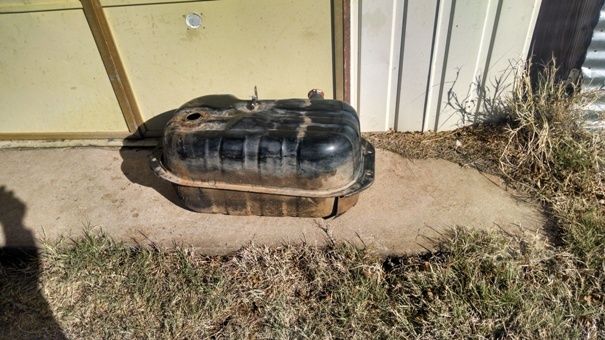
There was also an issue with the original fuel tank. You know
. I really wish I had drained the tank 10 years ago when I parked it. I ended up dropping it, and pulling the sender and fill pipe
..man was it ugly in there. I really didnt know if I would be able to get it clean enough to use again. Additionally the sending unit was junk (and I couldnt find a factory replacement, which resulted in having to use an aftermarket sender and gauge (and gave me another justification for the custom gauge cluster). I did finally get the tank clean, but it took about 2 weeks soaking the inside with acetone to do it.
-
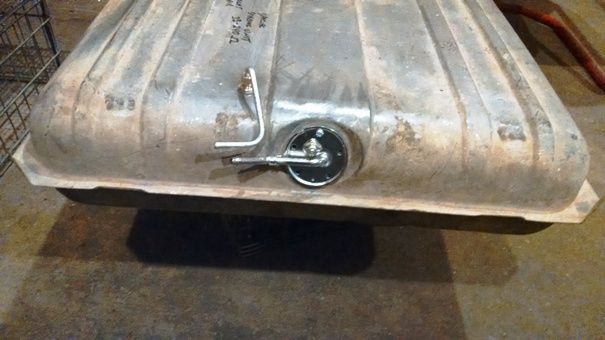
While the tank was soaking and not knowing for sure if it would clean up I also found out it only held 13 Gallons. With that I started looking at other options just in case. I found a 1958 Chevrolet Bel Air tank I had pulled out of a car years ago, and that looked like it might be a good fit. It had a bit of surface rust on the outside but looked brand new on the inside. The tank holds 20 gallons plus I had also saved the hangers for it.
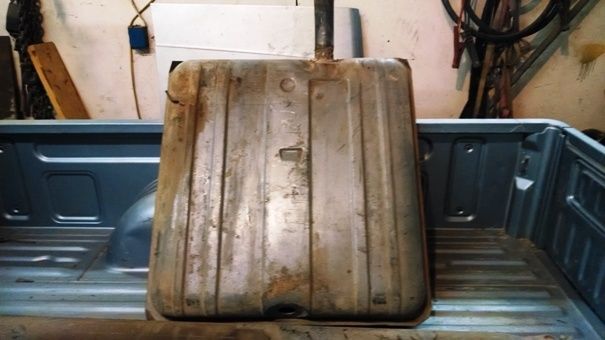
I ordered a new sending unit for it then did a couple of minor modifications; added a fuel return line, and shortened the filler neck (basically cut a short section out of the neck and reconnected the 2 pieces back together with hose (fuel rated) and clamps.
-
-
I'm currently getting the parts together for the drive shaft to mate the Ram 50's rear end to the T5 transmission. The trucks original drive shaft is in good shape, and fortunately it is long enough to be cut down so I don't have to build a drive shaft from scratch. I found a donor shaft in my spare parts pile that uses the correct size tube so it will be donating one of it's weld on yolks for the project.
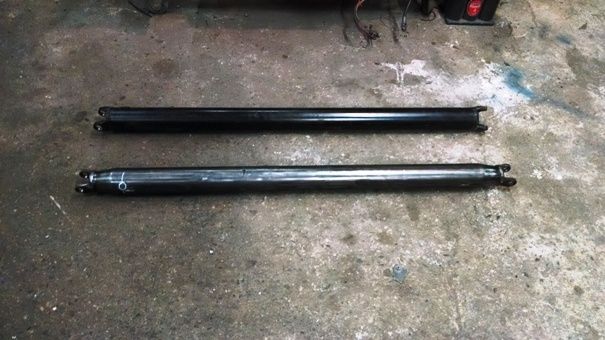
I talked to the drive shaft shop yesterday and the parts will be going up there the first of the week and hopefully I'll have the drive shaft back by the end of next week.
.
Tags for this Thread
 Posting Permissions
- You may not post new threads
- You may not post replies
- You may not post attachments
- You may not edit your posts
-
Forum Rules


 Reply With Quote


Bookmarks