God works in mysterious ways!


God works in mysterious ways!
Hey Brad, don't you have a sunroof also? did you install it or did it come with the truck? also would you happen to have any interior pictures of it? i'm trying to get a idea of how it will look in the roof
Had a visit from the MOOG fairly from rockauto land yesterday. and i think i'm getting close to having everything to attack and replace/restore my whole front end suspension/steering!!
here is what all i ended up getting
idler arm x1
pitman arm x1
tie rod end, front outer x2
tie rod end, right inner x1
tie rod end, left inner x1
tie rod end adj. sleeves x2
lower ball joints x2
steering damper x1
i can already tell from comparing this "problem solver" idler arm to the original factory one that it is a WHOLE lot more beefier!! and has a better angle for the swing of the steering arm.
also has anyone ever used one of these steering dampers before? to be honest i've never owned a vehicle that had steering as old school as this ones is but i've heard that when you go to wider rims and tires (like the 15x8.5's that i have) you need a demper to cut down on wheel shimmy at high speeds. thoughts? experiences?
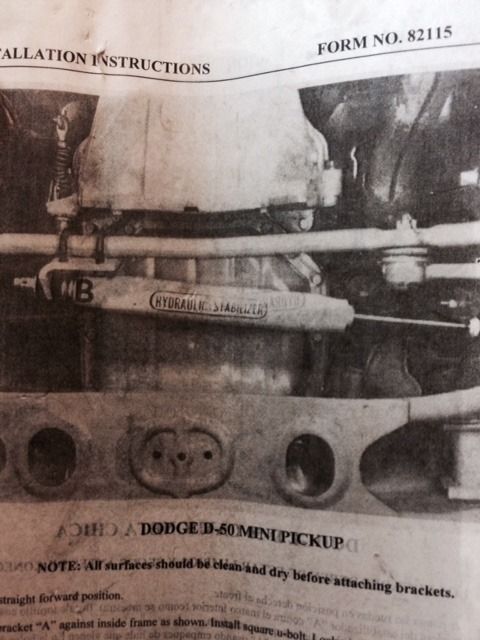


I ran a steering stabilizer on my 85 Ram 50 Royal 2wd lifted 3" with springs and ran 225-60-14 on 14 x 8 rims - it makes a world of difference and keeps the front end in one piece.

I've seen the Gabriel version of the steering stabilizer in their catalog and never knew what it was supposed to do on a truck. I know they're a bling bling farkle on sport bikes, supposedly to prevent speed wobble but I doubt many of the guys who have them track their bikes. Do they only helped lifted trucks only or would they help with lowered too?
they help with any truck lifted or lowered with bigger rims and tires - I an about to put one on my Blackwood that developed a shimmy when I went to 20 x 9.5 rims with 275-45-20 tires. It will also keep from trashing the idler arm bushings.
that's what i figured when i bought it. i know being lowered also puts stress on the steering just like a lifted truck even more so with my 15x8.5's wrapped in 225/60-15's so i figured i would give it a shot, won't really hang any lower than the cross member so i don't have to worry about scraping. to be honest this is one of the more "in-depth" steering and suspension set ups i've restored, SO MANY PARTS! i'm more use to a simple rack and pinion LOL
does it make the steering stiffer? like low turn speeds? i know the manual steering in these trucks can be a bear to work sometimes so i may get some beefy forearms out of this deal
shouldn't even notice it - it is not that stiff of a shock to cause resistance.
I thought they were for larger 4x4 trucks that could possibly return a steering wheel spin and possibly hurt a wrist or even lose the control of the wheel from bumps during 4 wheeling.
Lifted vehicles typically use them for bumpsteer due to such durastic changes to steering geometry when you lift over 4" taller than stock. I imagine on a vehicle with much wider tires would also benifit from them, as it changes the geometry as well.
That was my idea at least, the fact that i'm running such a wide low offset wheel and tire combo it would help a little bit with the bumpsteer. the weather has still been shitty here lately so i've just been working on other projects. but i am oohhh so close to getting this 4G64 out of the parts truck so i can start getting i apart
I also pittled around with these new energy suspension swaybar bushing mounts and ended up having to modify them a little bit because they didn't quite fit to my taste and were not level when bolted down. they send you the new mounts because the new energy suspension bushing is to big for the stock one.
i've also been getting my strut rods ready to go back in with their new bushings as well
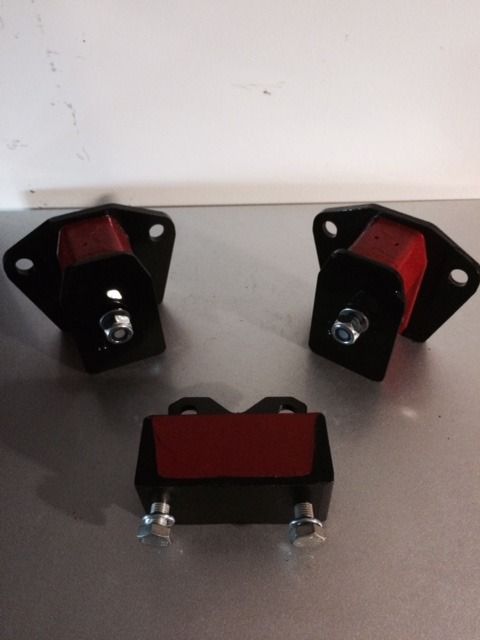
and last but VEERRYYYY MUCH not least of course there is always more parts piling up LOL i took a chance and bought these poly mounts to see if they would work for the mighty max and they do!!! and thanks to GNT Performance for making some badass motor and transmission mounts!
Last edited by thehive; 07-26-2015 at 02:58 AM.
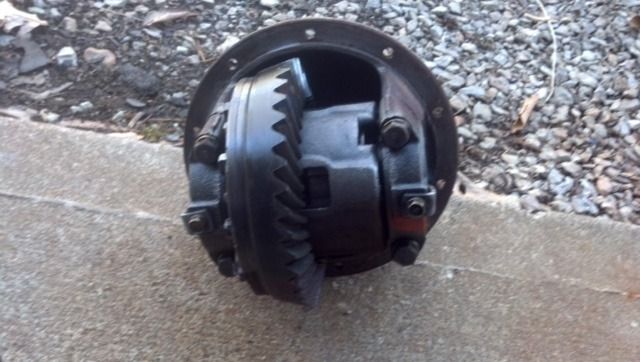
Had a stroke of GREAT luck and picked up these two bad boys for a whopping $125!!!! $50 for the trans and $75 for the Diff!!! i was a little skeptical at first until i met the guy, maaannnn did he have some talent, he's a aircraft mechanic and used to have a raider and had sold it some time ago for his dodge power wagon projects and just had the left over parts.
First up, a really nice cleanly used wideblock 5-speed. shifted great thru all the gears great and the input shaft spun great thru all the gears as well
Next up, a factory LSD in the carrier with a set of the killer 4.62 gears in it from a raider. now i already have a PowerBrute LSD in my factory carrier with the 3.91's but i think i may just keep this and swap them out one day and see how i like it
hey there all, i realize it has been a min since i did a update but i have literally been super busy using this warm weather here to the best of it's abilities.
gave the new transmission a much needed bath:
drained the oil out and was very glad to see it still a somewhat golden brown color. i also tried out my custom made shifter to see how it would mount up, i'm happy with it
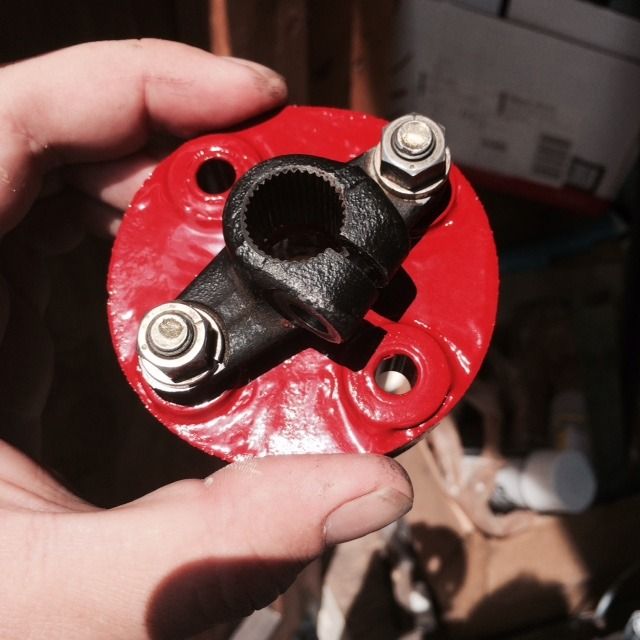
i also spend a good chunk of time trying to find a upgraded source for a steering bushing but kept coming up short. mine was still very much usable but was getting dried out and starting to crack
then i remembered i had some 2 part epoxy adhesive from back in the day that would even make JB weld look like a childs toy. i mixed some up and coated the whole bushing (wearing gloves of course) and bent the bushing back and forth letting it work it's way down into the cracks and filling them. after letting it sit up and cure till it was tacky to the touch i smoothed it all out with some acetone on a rag and let it set up for the night. the next day i painted it up with some red paint to match the other energy suspension bushings and i must say i'm quite happy with the results
Last edited by thehive; 05-16-2015 at 11:15 PM.
went about getting my old spindles off the truck too and trading with the ones of the 94 parts truck that i have. even thou they needed new bearings they were still a huge upgrade from my old ones, and hadn't been beaten do death from someone who didn't know how to use a balljoint separator properly
old:
new:
got all new front and rear bearings and wheel seals and went ahead and rebuilt my front spindles so they will be ready to install along with some new rotors and pads
recovered these too from the left over front end parts, took me FOREVER to burn off the old bump stops with a torch but i had a purpose. i know most people just replace the lower bump stops that hold down the toe bar with two bolts and go about their day but i just didn't like that idea for two reasons.
1: if the bolts you use arn't the EXACT same size as the holes the toe bar can shift thus throwing your alignment out of whack and causing problems.
2: i like the plate that the two studs are attached too, seems to be stronger and a better hold down than just two bolts alone.
also worked a good bit on my brake upgrade, i will be switching to the dual piston front calipers from Montero as well as the full rear disk brake set up from axle to axle. and because of these massive upgrades to each corner i figured it was probably a good idea to upgrade to the Montero master cylinder as well. My factory Mighy Max one was a heavy cast iron unit with a 15/16th inch bore, and the newer Montero one was aluminum and had a bigger 1 inch bore which should lead to some much better pedal feel. i had to swap over and bend a few of the hardlines as well but nothing to complicated.
began the process of cleaning up and painting my front calipers to get them ready to be installed and then putting them together and loading them with the new pads
and then it was install day!!! all the hard work and time spent with parts and gathering parts is about to pay off. i put my whole front end back together with all 100% rebuilt or 100% brand new parts, it will be as new as possible besides the showroom floor LOL
Parts:
Brand new factory upper control arms and ball joints
Lower control arms with brand new energy suspension bushings and Moog ball joints
Newer spindles fully rebuild with brand new Timken bearings inner and outer, new Beck/Arnley wheel seals and brand new front rotors
New lowering springs with Belltech shocks
Rebuilt Montero two piston front calipers
Upgraded from factory mighty max cast iron 15/16 master cylinder to a Montero aluminum 1 inch master cylinder
Cleaned and painted front sway bar and toe bars with all new energy suspension bushings and Endlinks
Well that's all i have for now but more to come soon!! i've got a Stainless Steel brake line kit on the way as well as the whole rear disk system to tackle. will have more updates and pics soon!
Last edited by thehive; 05-16-2015 at 11:09 PM.

Subscribed!
Nice build. Subscribed.
so...I can flip my solid disc barbeque plates and spindles from my '85 for a much later vented assemblies and hubs? My brakes are GARBAGE and being able to go to twin pistons will be a quantum leap improvement. I have a Cordia turbo master cylinder and booster so that should have that end of the deal covered.

Yes geezer, you can upgrade your wimpy 1st gen brakes with 2nd gen stuff, you just need 2nd gen spindles and all associated parts.
I like go, but I like stop too! I spotted a 2nd gen 2wd last time I was at the wrecker but they have a bad habit of turning stock over quickly - it had everything I would've needed to do the swap. You've done a great job on your front end upgrade thehive, this is another job I'll have to add to my to-do list. Are you going for braided hoses as well? They add that bit of extra bite.

Fun build.
 Posting Permissions

 Reply With Quote


Bookmarks